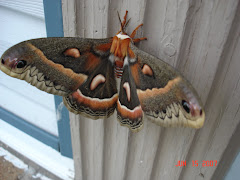
Please ignore any and all weeds!!
Tuesday, August 26, 2014
Tuesday, July 22, 2014
Storm damage
We were shopping in Grand Forks.
We knew it was going to be stormy weather and were rushing as much as possible to get home before it hit.
In the end the rushing didn't matter. The weather was moving faster than we were.
We decided to park close to a brick building to help diminish damage to the pickup and wait out the worst of the storm.
I was on my phone on Facebook asking for suggestions if we should take off or hang in where we were. 2 people said stay put. And so we did. Good plan as it turned out.
I kept looking at the radar. It was serious weather this time, folks. Rain. Hail. Extreme winds. Tornado warnings.
There we sat. In a pickup. With the tornado sirens going off. Rain and wind that looked like a snowstorm, visibility-wise. Rocking in the wind. Yea.
I'd been texting with 2 of our sons. And then DH got a phone call from one of the sons in our hometown. He said, "Do you want the bad news?". Well, not really but go for it.
4 bins had blown down at our seed plant.
Here's number 1.
And a closeup view of some of the damage to it.
And here are bins 2, 3 and 4.
And a couple shots of the worst damage to the one on the right end.
There has been a stream of traffic going by to see them. The guys that work at the plant said we should charge admission! Gotta keep your sense of humor. Especially at a time like this.
I'm dragging today. I thought I slept but it sure doesn't feel like it.
So to cheer me and everyone else up here are a couple pics of Teddy.
Looking like the king of the house that he thinks he is.
We knew it was going to be stormy weather and were rushing as much as possible to get home before it hit.
In the end the rushing didn't matter. The weather was moving faster than we were.
We decided to park close to a brick building to help diminish damage to the pickup and wait out the worst of the storm.
I was on my phone on Facebook asking for suggestions if we should take off or hang in where we were. 2 people said stay put. And so we did. Good plan as it turned out.
I kept looking at the radar. It was serious weather this time, folks. Rain. Hail. Extreme winds. Tornado warnings.
There we sat. In a pickup. With the tornado sirens going off. Rain and wind that looked like a snowstorm, visibility-wise. Rocking in the wind. Yea.
I'd been texting with 2 of our sons. And then DH got a phone call from one of the sons in our hometown. He said, "Do you want the bad news?". Well, not really but go for it.
4 bins had blown down at our seed plant.
Here's number 1.
And a closeup view of some of the damage to it.
And here are bins 2, 3 and 4.
And a couple shots of the worst damage to the one on the right end.
There has been a stream of traffic going by to see them. The guys that work at the plant said we should charge admission! Gotta keep your sense of humor. Especially at a time like this.
I'm dragging today. I thought I slept but it sure doesn't feel like it.
So to cheer me and everyone else up here are a couple pics of Teddy.
Looking like the king of the house that he thinks he is.
Monday, June 30, 2014
The story of a knitting bag.
The life of this knitting bag started with "free" things.
I got this very pretty bag when I bought cosmetics.
And one fine day I received an email from KnitPicks saying that I would get these items free if I ordered a certain $ amount of other things.
Who can resist "Free"?? (Not me apparently!)
But the big dilemma was this: I didn't know what to do with these things because I don't have a knitting bag that doesn't already have all the little knitting accessories already in it.
What to do. What to do.
Aha! I can make myself another knitting bag! Dilemma solved!
Now just for the sewing.
I had fabric on hand because for years I have been planning on making myself aprons. You know the kind like everyone's gramma used to wear? Well, that fabric became a knitting bag instead of aprons! Although, I do have fabric left over. I could still come up with some form of apron from that...hmm.
Anyway! Back to the knitting bag.
I wanted this bag to be cozy and so decided to quilt the fabric together.
I also intended to take step by step pictures but that didn't happen! These are it.
But here is the finished product.
I'm going to forget all that and enjoy my new knitting bag.
That started with all those "free" things!
side note...I am compulsive but it is purely coincidence that the fabric on the front of the bag matches the back. I honestly didn't plan it that way. Nothing that I plan works out THAT good!
2nd side note....you can tell the front from the back by the color of the buttons on the handles.
I got this very pretty bag when I bought cosmetics.
And one fine day I received an email from KnitPicks saying that I would get these items free if I ordered a certain $ amount of other things.
Who can resist "Free"?? (Not me apparently!)
But the big dilemma was this: I didn't know what to do with these things because I don't have a knitting bag that doesn't already have all the little knitting accessories already in it.
What to do. What to do.
Aha! I can make myself another knitting bag! Dilemma solved!
Now just for the sewing.
I had fabric on hand because for years I have been planning on making myself aprons. You know the kind like everyone's gramma used to wear? Well, that fabric became a knitting bag instead of aprons! Although, I do have fabric left over. I could still come up with some form of apron from that...hmm.
Anyway! Back to the knitting bag.
I wanted this bag to be cozy and so decided to quilt the fabric together.
I also intended to take step by step pictures but that didn't happen! These are it.
But here is the finished product.
I added lots of pockets and a zipper to keep everything safely inside.
We won't talk about how much trouble that zipper was to install. Or how long it took to put the rick rack on. Or that it actually took me 2 afternoons and 2 evenings to make the whole bag. Yikes!
I'm going to forget all that and enjoy my new knitting bag.
That started with all those "free" things!
side note...I am compulsive but it is purely coincidence that the fabric on the front of the bag matches the back. I honestly didn't plan it that way. Nothing that I plan works out THAT good!
2nd side note....you can tell the front from the back by the color of the buttons on the handles.
Friday, June 27, 2014
The treasure became a shawl
I didn't knit either pattern that I mentioned in the last post. I did
spend more time on Ravelry and found the one I loved the most.
And so I listened and added lots of pretty beads.
The pattern is Positive Thoughts #1. There weren't any beads in the pattern.
But when I looked at the pattern is seemed to be calling for beads.
And so I listened and added lots of pretty beads.
I think I love it!
All the details are on Ravelry, here.
Friday, May 30, 2014
A treasure in the mail.
I went to the post office late yesterday afternoon...actually it was evening...and I was met with a very pleasant surprise. A package!
I thought of taking pictures as I went along opening it but I couldn't wait to see what was inside so I just ripped into it. I put it all back together this morning and did the photo shoot...err...maybe not photo shoot so much as snap shots.
Please excuse the quality.
Prettiness! I was excited already.
Even the tissue paper is cute.
They did all bloom! And I had no clue what colors I had planted so it was a pleasant surprise when they opened up. :)
Actually the daffodils bloomed too. How did I miss getting them in the picture?
Even the grape hyacinths are doing their thing!
Thanks again, for the awesome yarn, Karen!
I thought of taking pictures as I went along opening it but I couldn't wait to see what was inside so I just ripped into it. I put it all back together this morning and did the photo shoot...err...maybe not photo shoot so much as snap shots.
Please excuse the quality.
Prettiness! I was excited already.
Even the tissue paper is cute.
But what was inside that cute tissue paper was gorgeous! What a wonderful color! I love it!!
My first thought was "What a wonderful shawl that will make!". (I even said it out loud and it was only me and the cat at home. I was pretty excited!)
I've never knit with this before so it'll be fun to try it out.
And how did this wonderful yarn happen to get into my mailbox, you ask?? Well, Karen had a contest on her blog and I WON!! Thank you SO MUCH, Karen!
Of course, you know, that as soon as I saw that yarn and knew it had to be a shawl, I got on Ravelry and spent a couple hours, I mean a few minutes, looking at patterns. I might have narrowed it down to two. Sweet Tantalate or Semele. Time will tell if one of these wins or if I spend a couple more hours minutes on Ravelry!
A little update on the tulips...
They did all bloom! And I had no clue what colors I had planted so it was a pleasant surprise when they opened up. :)
Actually the daffodils bloomed too. How did I miss getting them in the picture?
Even the grape hyacinths are doing their thing!
Thanks again, for the awesome yarn, Karen!
Sunday, May 18, 2014
It took 7 months for results.
Last fall, being anxious to have color in the spring, I planted tulips, grape hyacinths, and daffodils.
Yes. I am that obsessive. I used that tape measure to try to center the bulb plot in the bed and to dig to the correct depth.
There was good snow cover all winter so I wasn't afraid of winter kill. The bed is right next to the house so it should keep gophers from invading and eating the bulbs. And there wasn't any of that. Phew!
I did start to worry about having planted them too deep though. Would they come up in the spring? If they come up, would they bloom?
I didn't need to worry. They came up.
The daffodils are blooming.
And the tulips soon will be.
WooHoo!
Spring color!
Even if spring is very very late.
Yes. I am that obsessive. I used that tape measure to try to center the bulb plot in the bed and to dig to the correct depth.
There was good snow cover all winter so I wasn't afraid of winter kill. The bed is right next to the house so it should keep gophers from invading and eating the bulbs. And there wasn't any of that. Phew!
I did start to worry about having planted them too deep though. Would they come up in the spring? If they come up, would they bloom?
I didn't need to worry. They came up.
The daffodils are blooming.
And the tulips soon will be.
WooHoo!
Spring color!
Even if spring is very very late.
Monday, April 21, 2014
Easter creations*
Many, many years ago when the boys were truly boys, we made these eggs and basket. It was a great way to occupy them for a bit and just think...I have Easter decorations yet. All these years later.
They were relatively simple to make. All you need is: balloons, crochet thread in different colors, rick rack, lace and/or ribbons, glue or hot glue gun, sugar and water. Oh...and a little time.
Blow up the balloons to the size egg/basket you want to make.
Wrap the crochet thread around the balloon in every which direction.
Dip/roll the whole works in a mixture of 2 cups sugar to 1 cup water that has been boiled to dissolve the sugar and then cooled.
Choose which end you want for the bottom and press down to flatten slightly.
It's gonna be a drippy mess so if you can put them in a sink or bathtub to dry that'd be good.
Once they are dry, cut out the front to make an egg or a handle to make a basket. It's tough going...you gotta have a strong scissors and even stronger hands!
Decorate the outsides and insides as you wish. And they don't have to be for Easter. They make cute springtime décor too!
Great project for grandkids also...I think I need to get the materials on hand... :)
*I know. I'm late as usual but thought I'd post it anyway. You can be ready for next year?
They were relatively simple to make. All you need is: balloons, crochet thread in different colors, rick rack, lace and/or ribbons, glue or hot glue gun, sugar and water. Oh...and a little time.
Blow up the balloons to the size egg/basket you want to make.
Wrap the crochet thread around the balloon in every which direction.
Dip/roll the whole works in a mixture of 2 cups sugar to 1 cup water that has been boiled to dissolve the sugar and then cooled.
Choose which end you want for the bottom and press down to flatten slightly.
It's gonna be a drippy mess so if you can put them in a sink or bathtub to dry that'd be good.
Once they are dry, cut out the front to make an egg or a handle to make a basket. It's tough going...you gotta have a strong scissors and even stronger hands!
Decorate the outsides and insides as you wish. And they don't have to be for Easter. They make cute springtime décor too!
Great project for grandkids also...I think I need to get the materials on hand... :)
*I know. I'm late as usual but thought I'd post it anyway. You can be ready for next year?
Subscribe to:
Posts (Atom)